How to install WordPress in localhost? Step by step guide.
What is the localhost?
Before going for the localhost you should understand what is hosting? Hosting basically means that your website is being provided from some kind of computer servers to the clients, hosting in terms of web refers to the storage space provided to host (provide) your website to the respected clients. Whereas the local host is the hosting feature which is locally present on your own machine, such that your website will use your own computer for hosting purpose and will serve your website to the client locally without using the internet. For using your own computer as localhost you will need a server application for making databases for the websites, there are many server applications present in the market which I will be explaining in this article.
How to install WordPress in localhost? Step by step guide.
Installing WordPress in localhost is a very easy process; you can use any server application platform to use WordPress in localhost. To run the WordPress in localhost you will need mainly two things, such as-
- Server application
- And CMS file of WordPress
A server application can be anyone like- XAMPP, WAMP, BITNAMI, etc. You can opt for any of the applications for using WordPress in localhost, there are some differences but their work is nearly the same. In bitnami it’s very easy to install and run WordPress, while in the case of Xampp and wamp you will need to make a database before installing the WordPress, but in the case of bitnami you will get the WordPress cms file and PHP server with the bitnami set up so that you will not need to download WordPress separately so if you are a beginner then just start with the bitnami.
So for the step-by-step guide, I will tell you the process of installing the WordPress in bitnami.
NOTE- I will tell you the steps to install the bitnami and use WordPress with that but, if you want to use multiple WordPress then just go for the Xampp or wamp platform.
Step 1– just search bitnami and install the bitnami, it’s free to download and use.
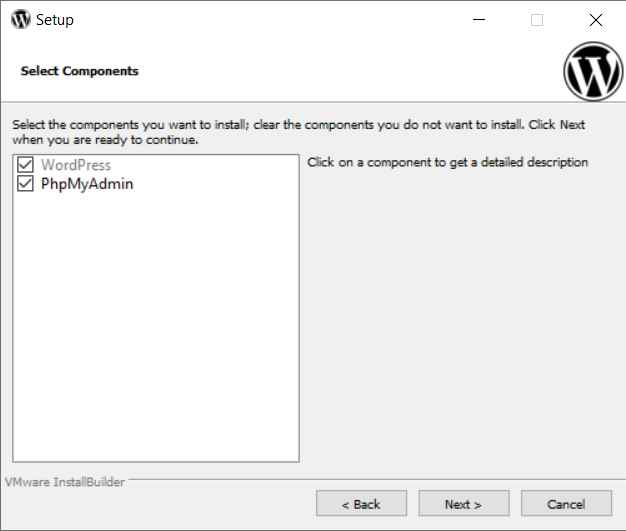
Step 2– now just run the installation, and install both the PHP my admin server and WordPress cms file as ….
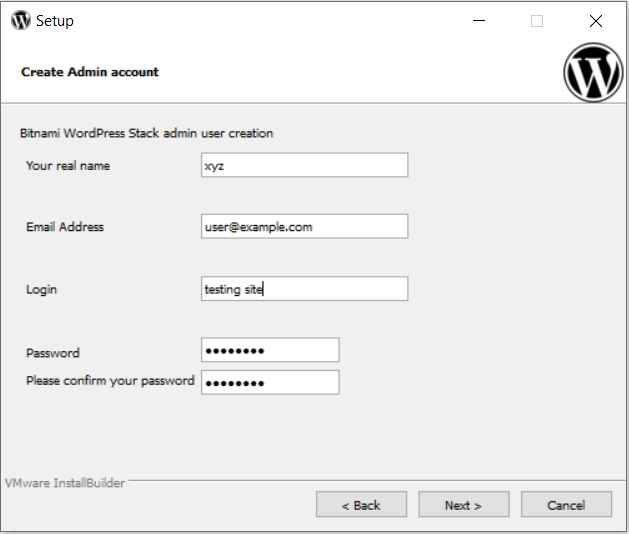
Step 3– Now in the next process; just create your user name and password…
Step 4– Now just click next and complete the installation process…
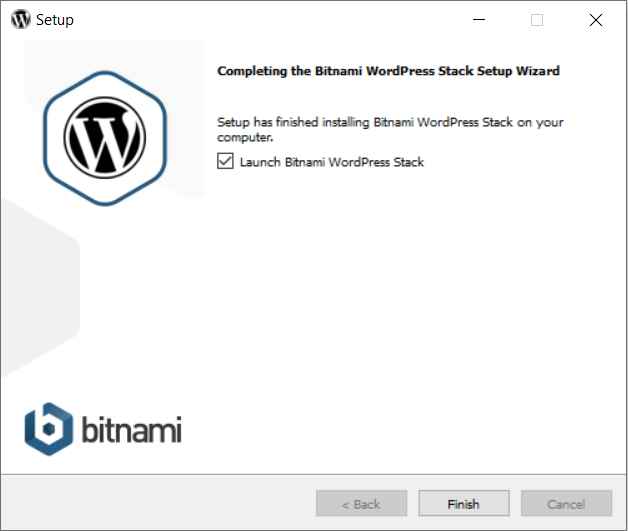
Step 5– Now after you have completed the installation, click on the launch button in the setup menu itself or just in the search option of the browser click “127.0.0.1” and just search this, you will get this menu, and click on access WordPress.
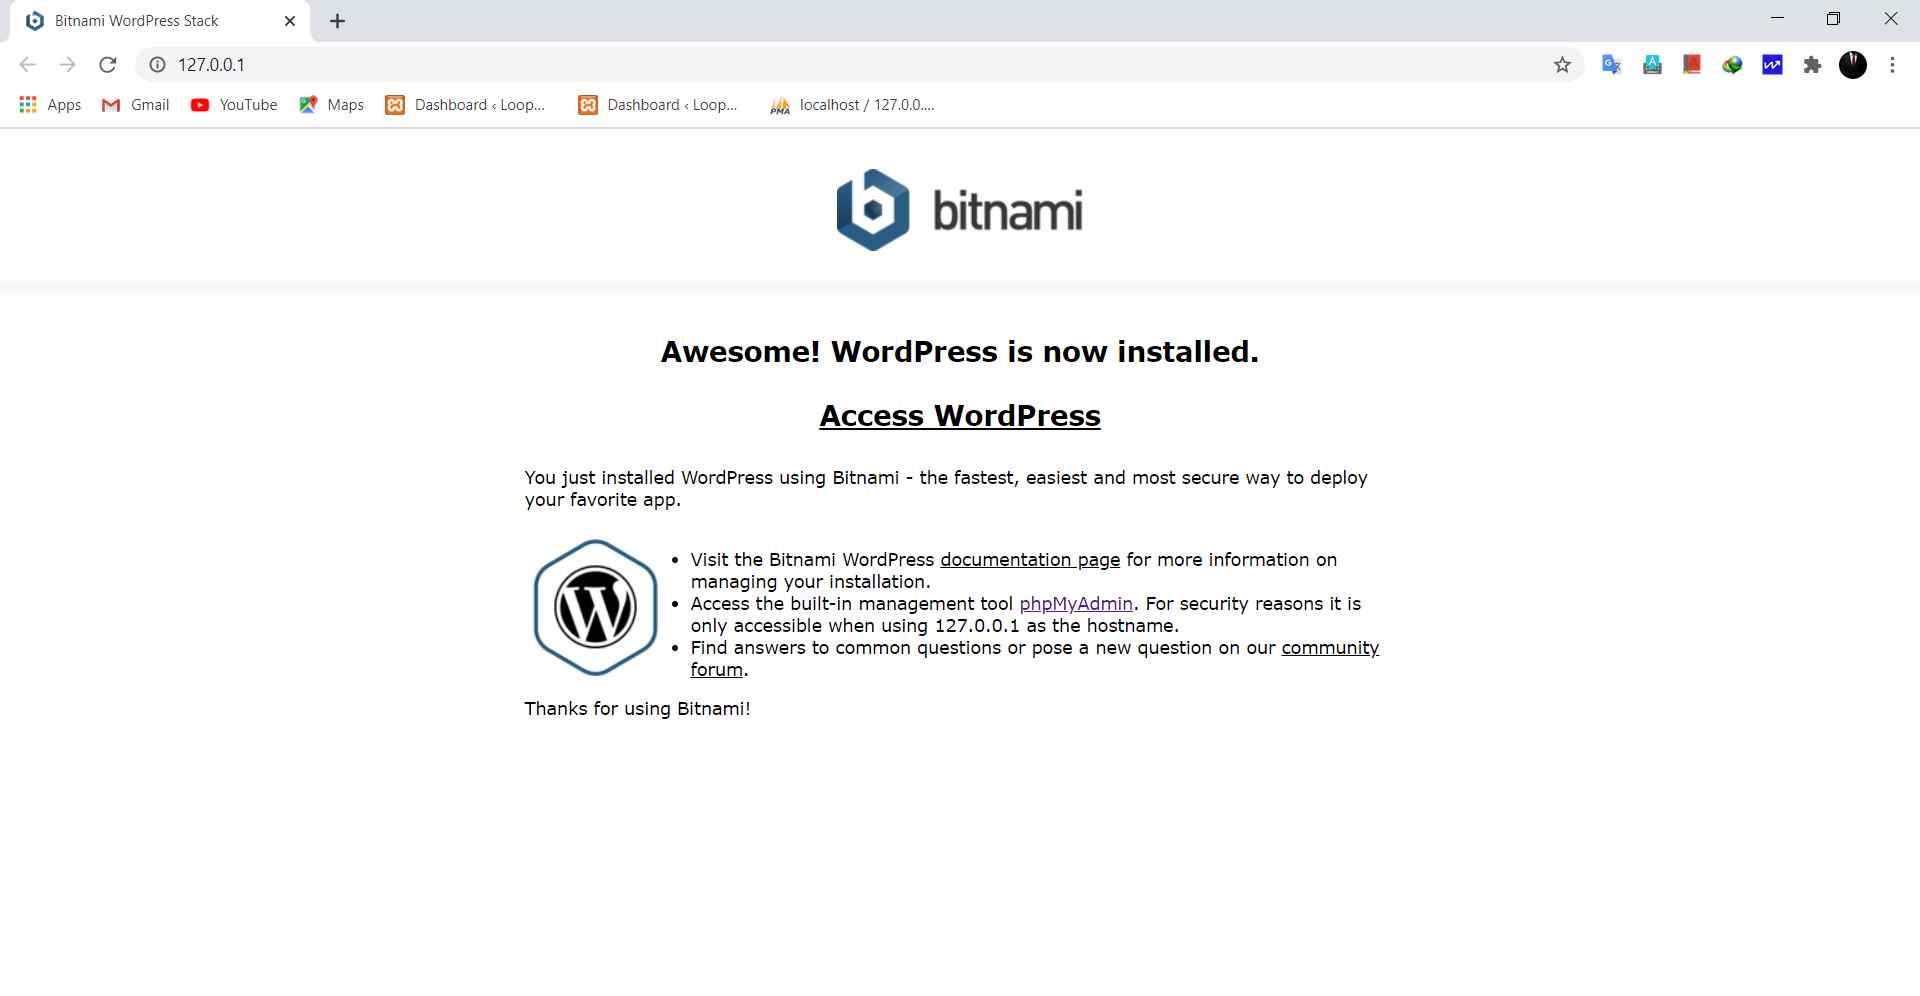
After you have clicked on “access WordPress”, it will ask for your username and password; just enter the username and password you have made in the installation process.
Step 6– After filling in the password and username you will get your website as…
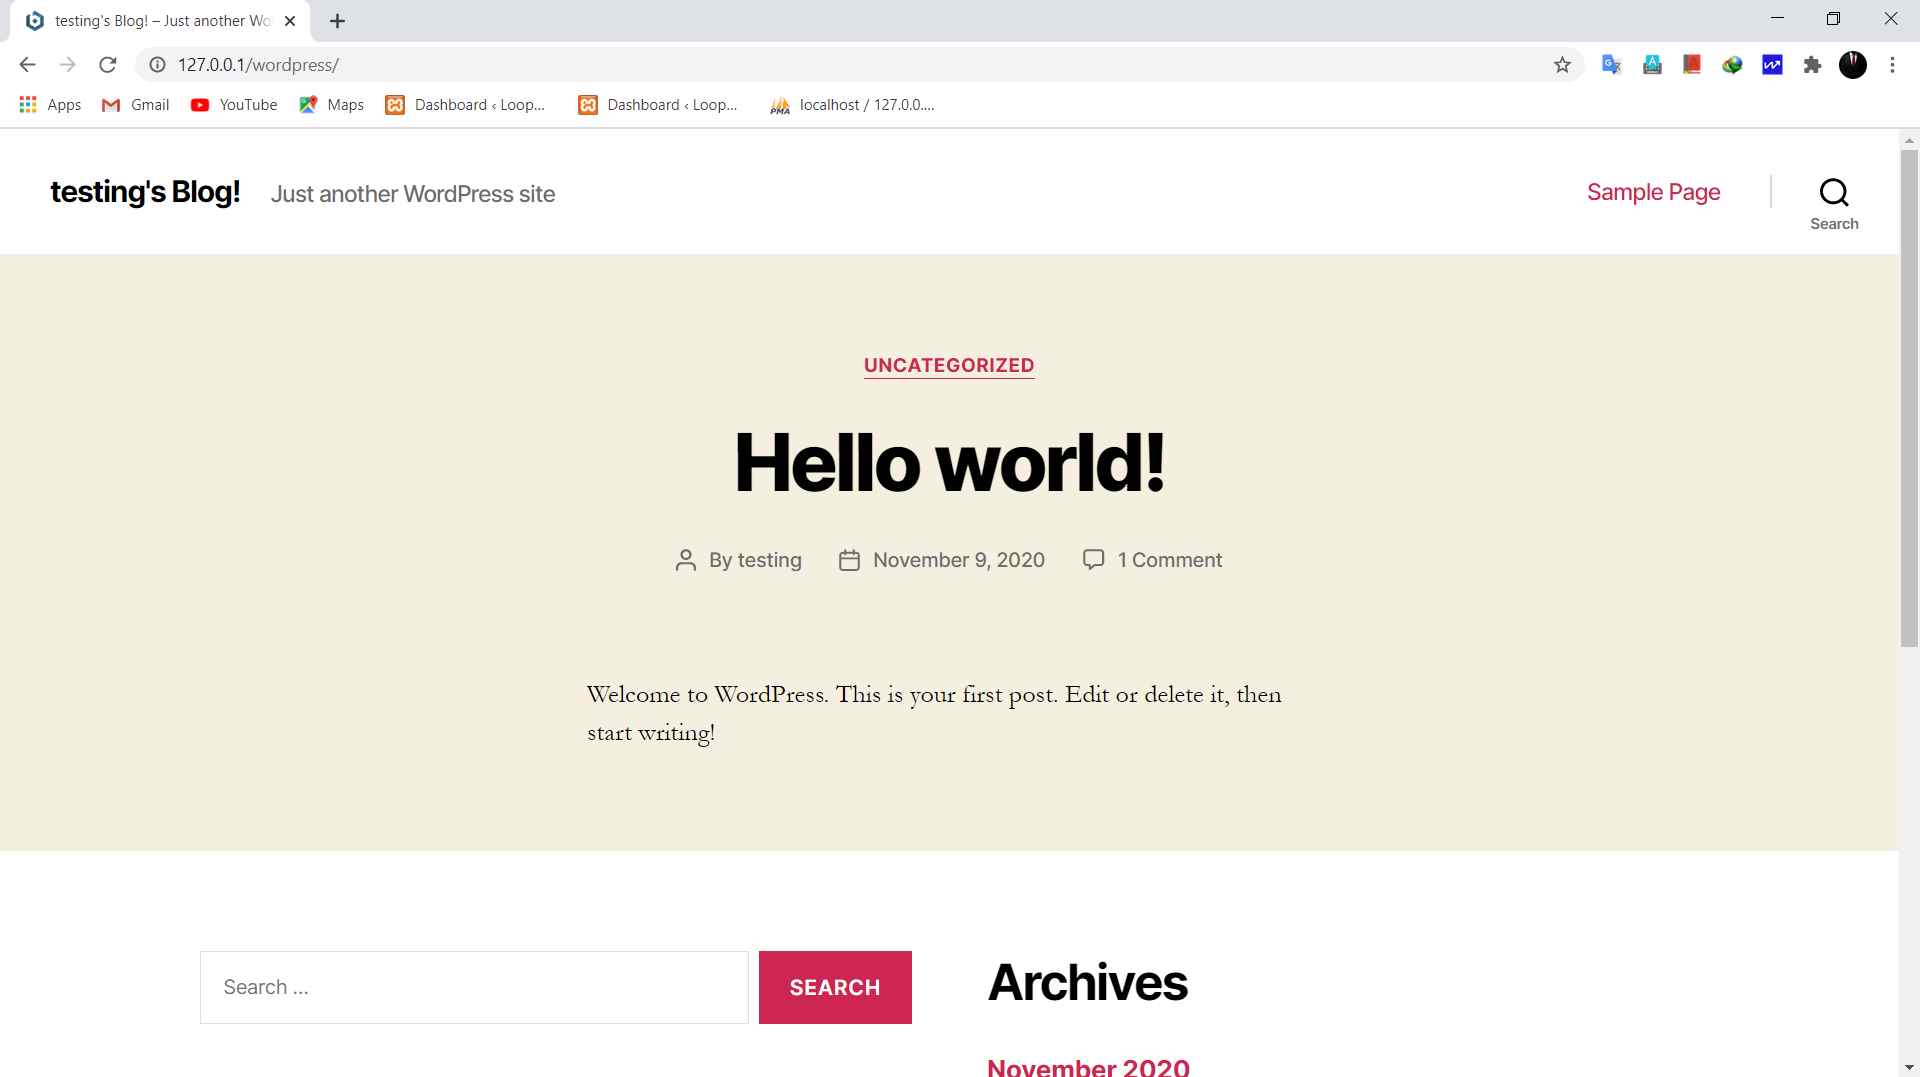
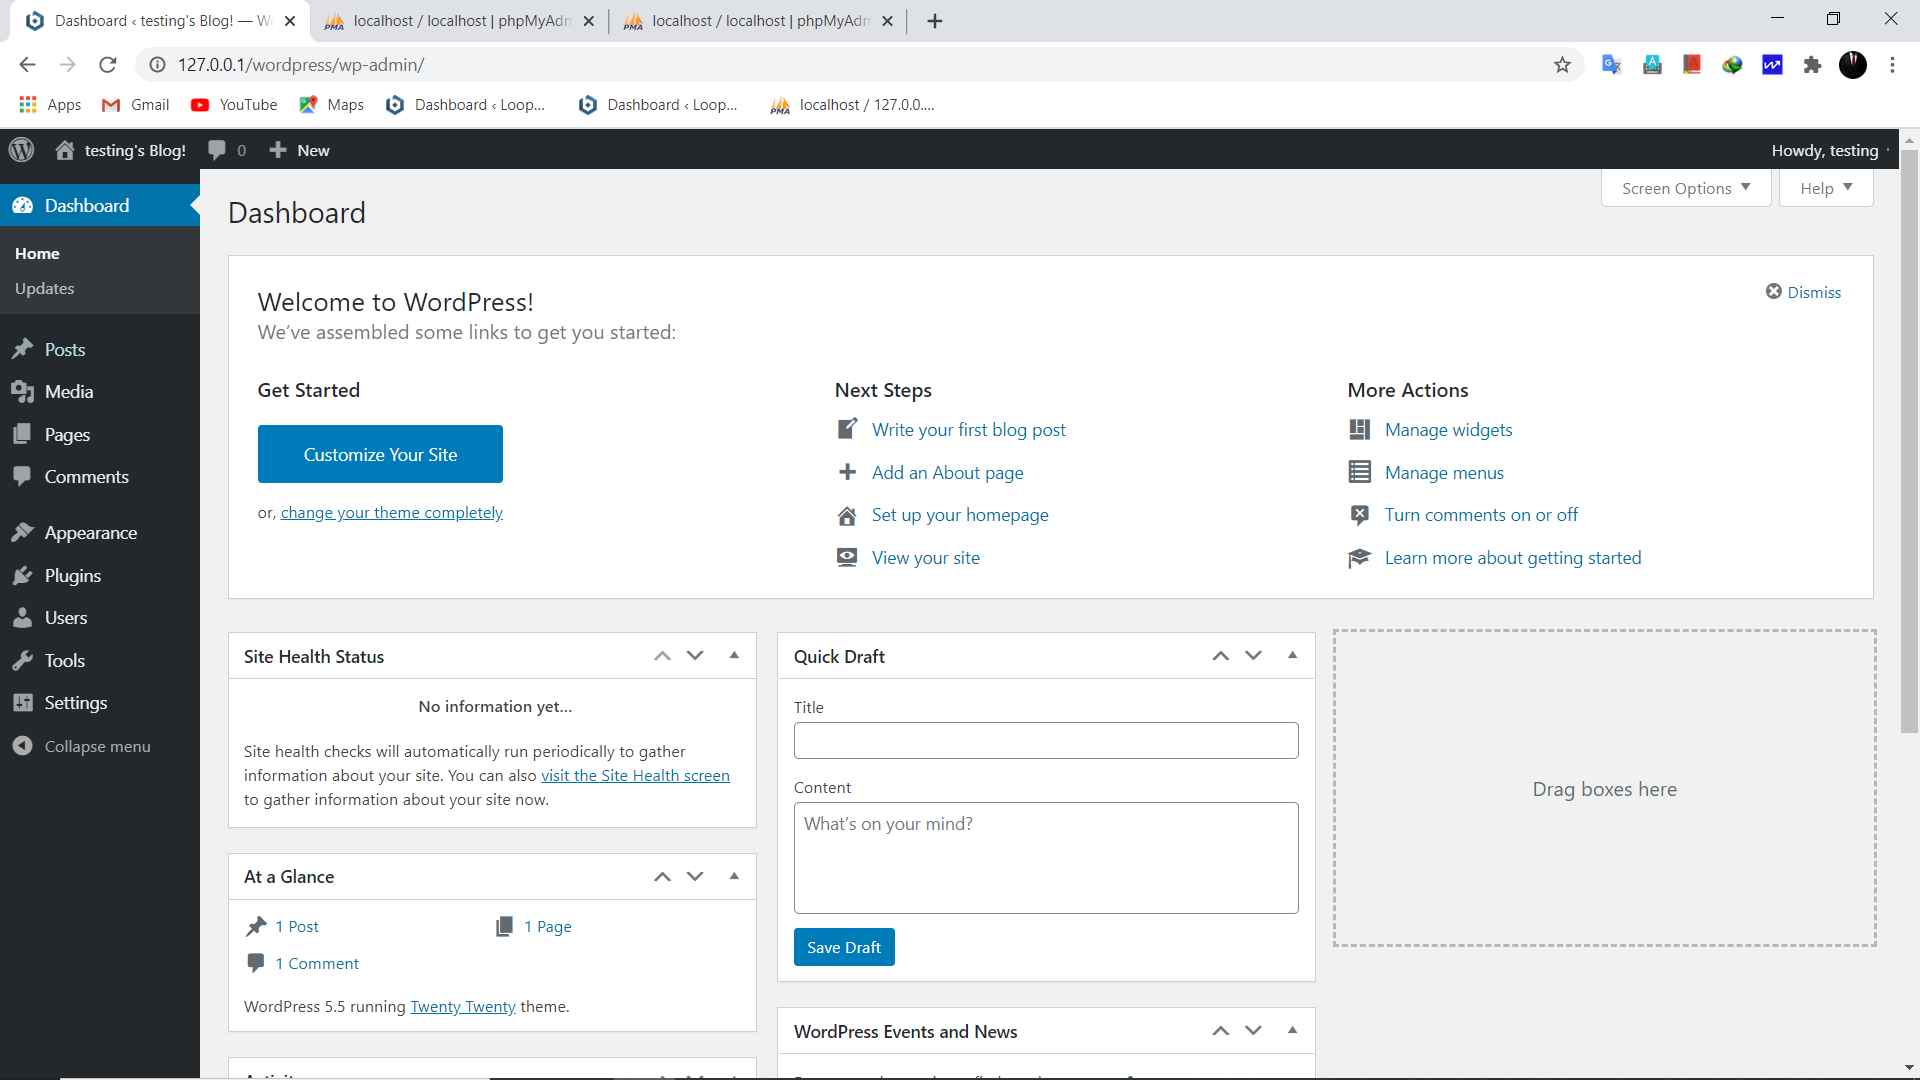
Step 7– now you have seen your website but have not got your WordPress dashboard, so to get your dashboard, just go in the browser and search:

Now after searching this “127.0.0.1/wordpress/wp-admin”, you will get your dashboard as…
How to install multiple WordPress in localhost? Step by step guide.
In the above article, I have explained to you the process of installing WordPress in localhost with the help of bitnami application, but let me make you one thing clear that you can install multiple WordPress in bitnami but I will not recommend you to do this, as bitnami is very easy for the single WordPress installation, while I discovered that Xampp is suitable for the multiple WordPress installations, and I will be telling you the full process of installing the multiple WordPress in the local host with the help of xampp application.
* Process of installing multiple WordPress with the help of xampp web server…
Step 1.
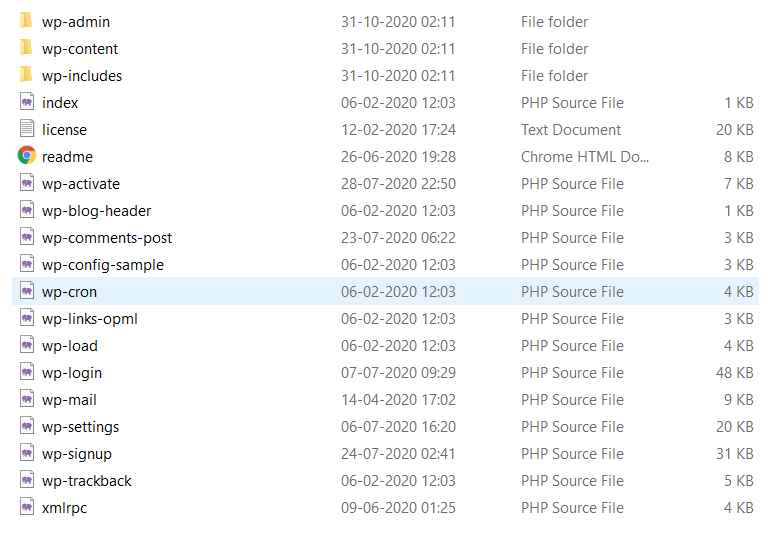
First of all download the xampp server for your machine and WordPress cms file, these two are completely free, you can download them directly from their website. Here is a look at the WordPress cms file which you can download from (wordpress.org), which is of only 15MB.
Step 2.
After downloading these above files you have to install the xampp server (installation process is very easy). One thing here you should be careful on that you have to install the xampp server in the drive “c”, such that you should not install it in program file or program files x86, just have a look at it…
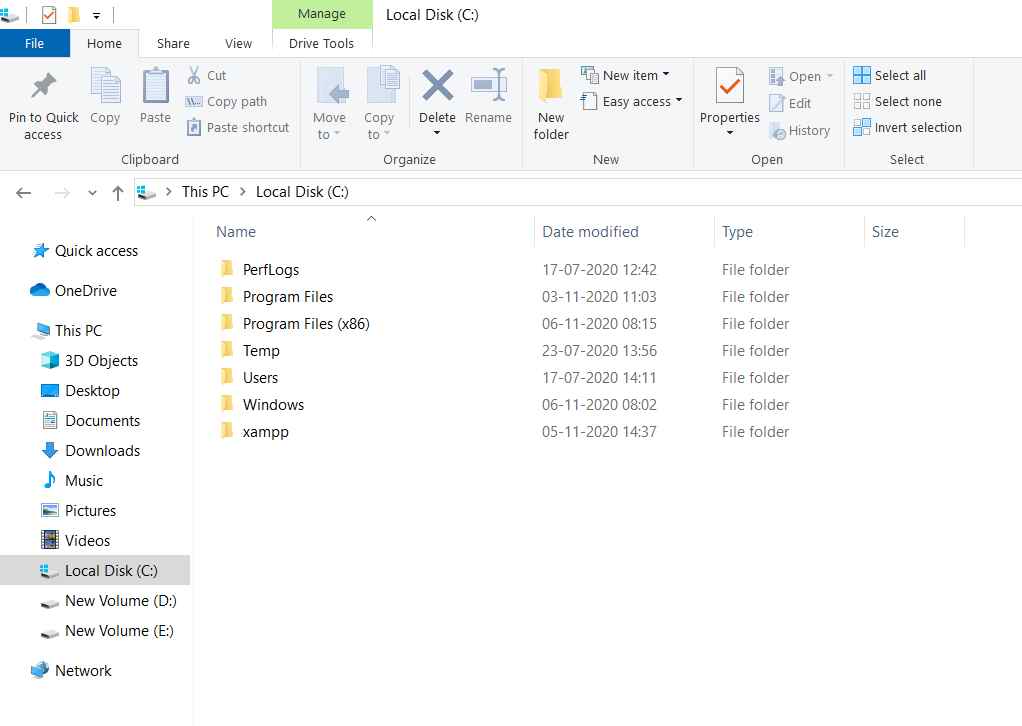
If you will install the xampp server inside the program file then you will face an administrator access problem, so install the xampp server in drive c in a separate folder such as… (Drive c/xampp).
Step 3.
So after installing the WordPress in drive “c”, you will see a folder named “htdocs”, this is the main folder where you have to pay attention. If you just want to install the multiple WordPress then you have to make the separate folders for your website have the same name which you will be used for developing the WordPress website. Just have a look at this pic….
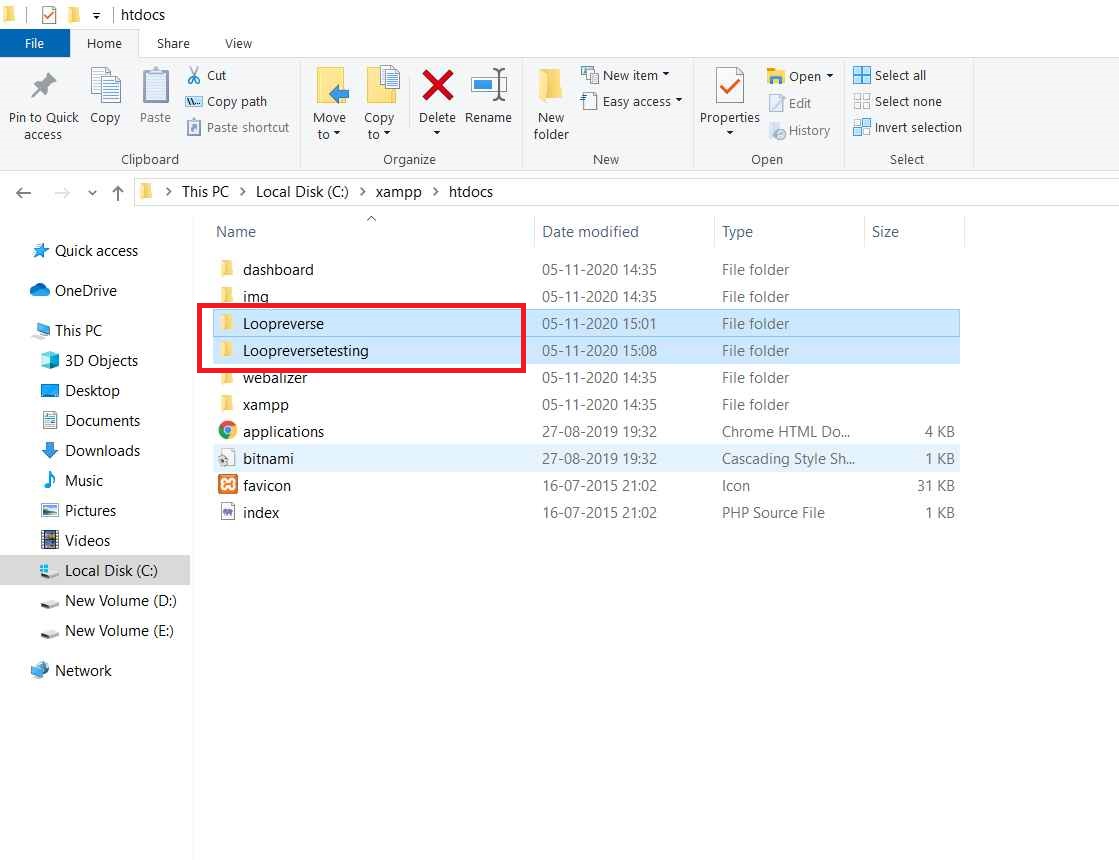
As in this image, you can see that I have made two websites with the names- “loopreverse” and “loopreversetesting”, so if we want to make multiple websites we have to make the folders for the respective websites with the particular names which we will use that name for the website also, such as we will develop two mare website in the local host with the names as…
- Examplesite1
- Examplesite2
Just have a look at these folders…
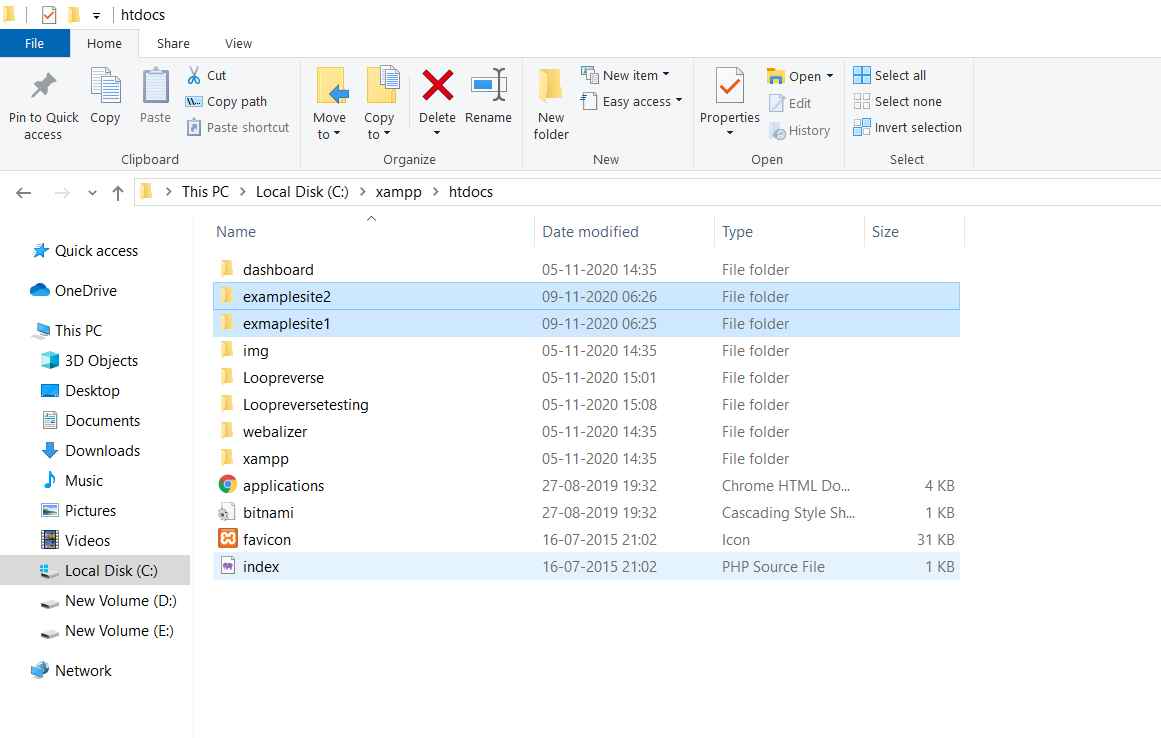
So after making the folders just copy the contents of the cms file in both the folders.
Step 4.
Now you have to start your xampp server, and just click on “start” for the apache and MySQL server as shown in the picture…
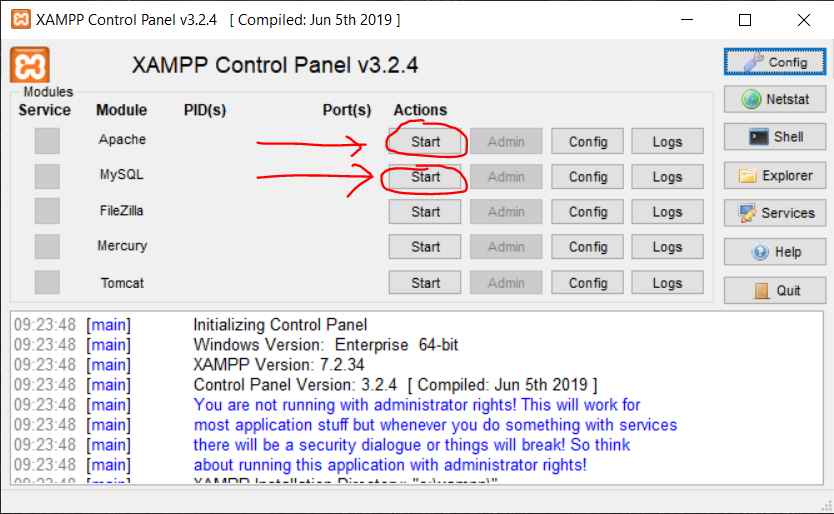
Now minimize this application window.
Step 5.
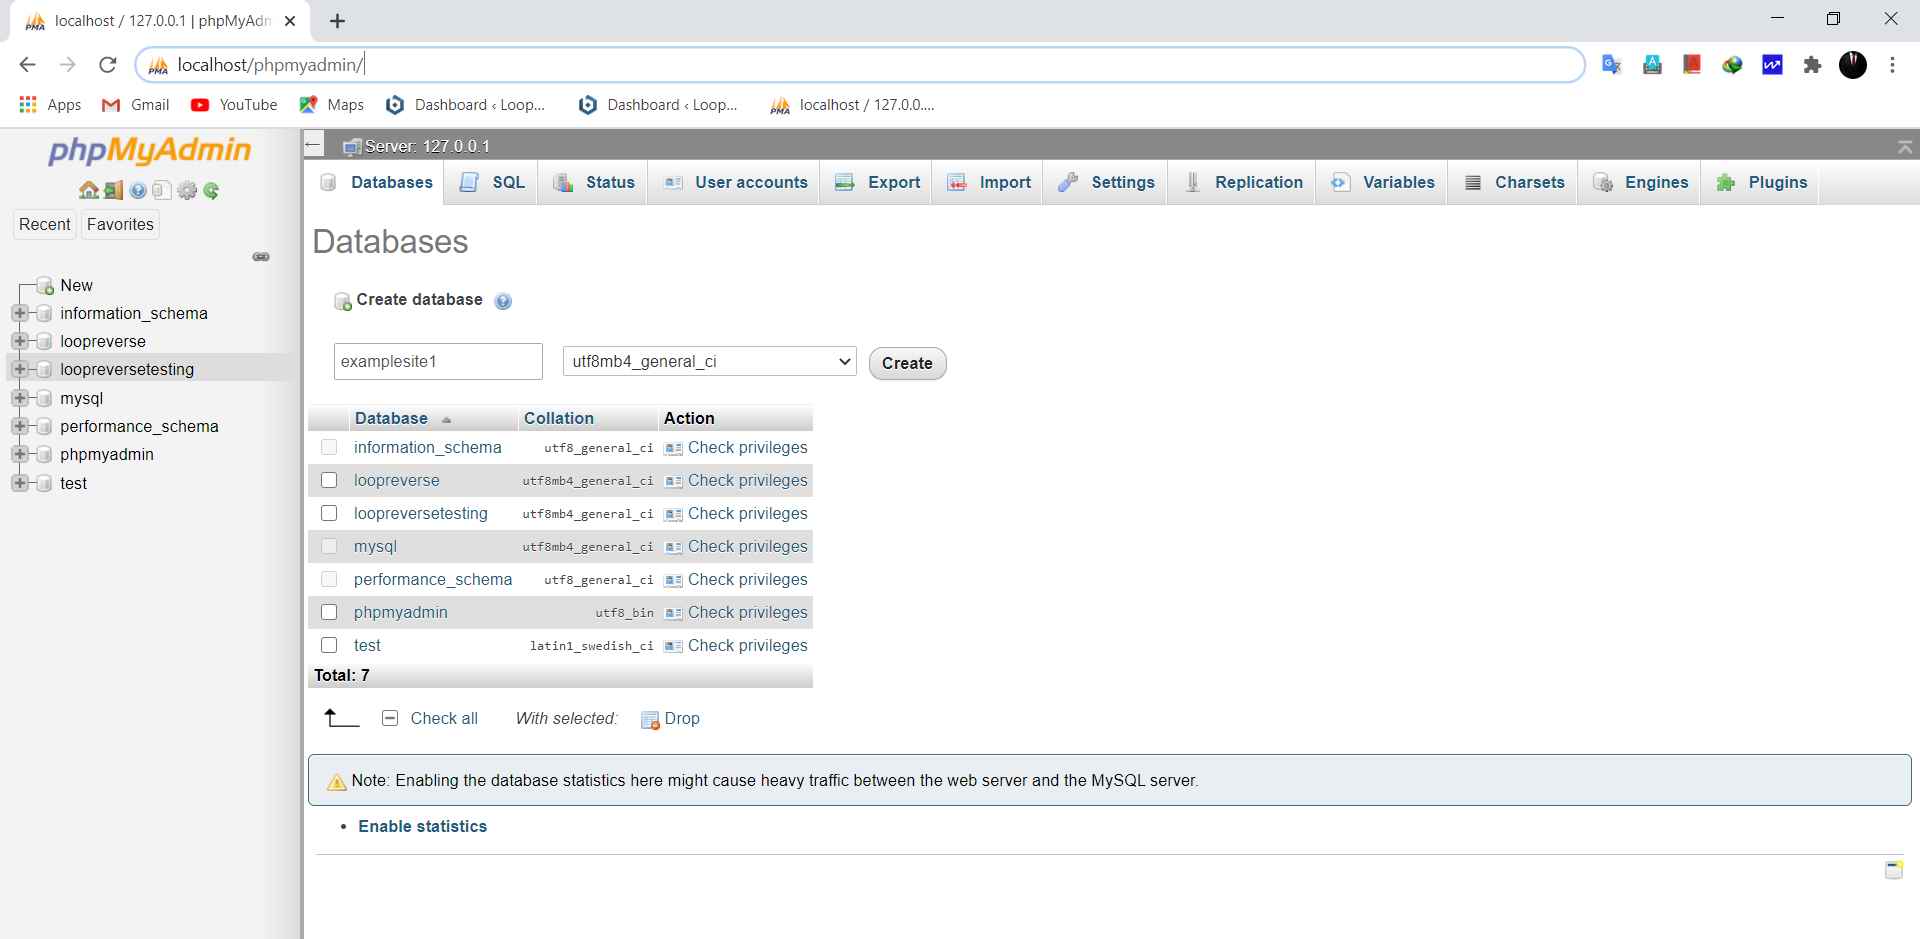
In this step, you have to open your browser and search for the “(localhost/phpmyadmin/)”, just see In the fig….

Now search this and it will open your apache web server, and you have to click on “database”, as shown in fig…
Step 6.
Now once you have clicked on the database, just click on “database name” and enter the folder name which you have created earlier in the “htdocs” folder. Now click on create, this will create the database for your website.
Step 7.
Now again search in your browser- “(localhost/your site name)” as shown in the figure…

This will open the below window as…
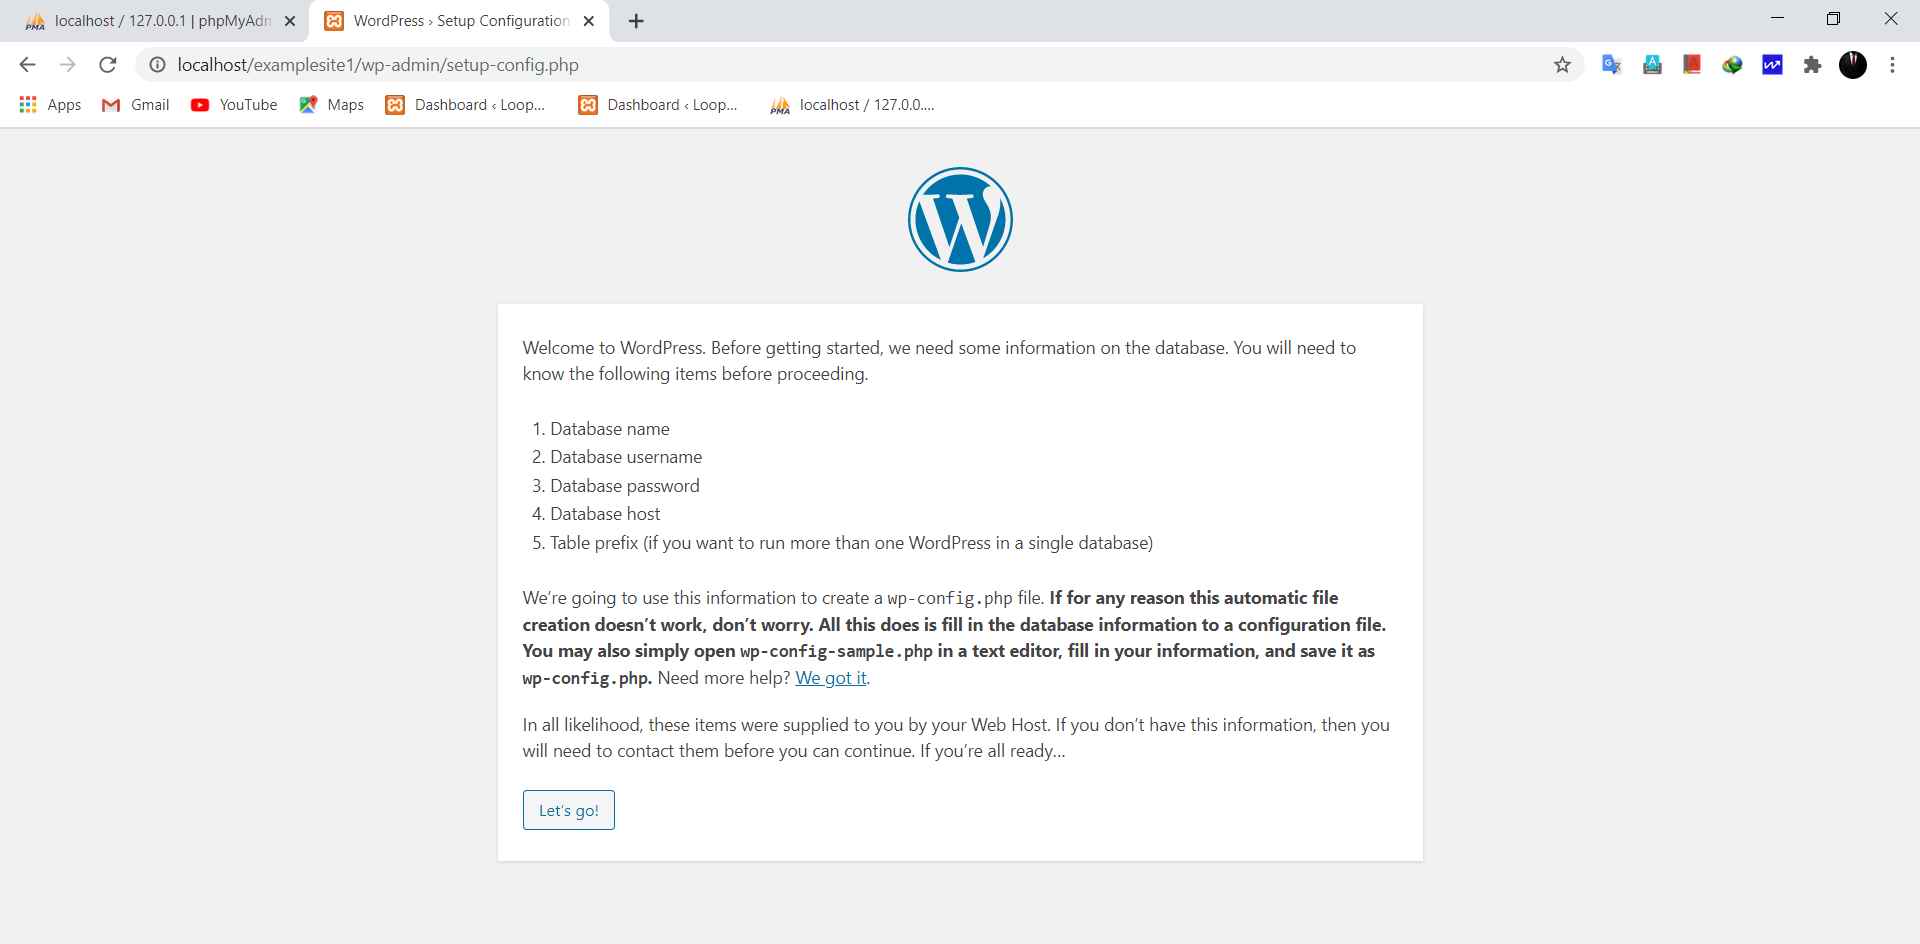
Now click on “let’s go”
Step 8.
Now ones you clicked on let’s go, you will see a new window as…
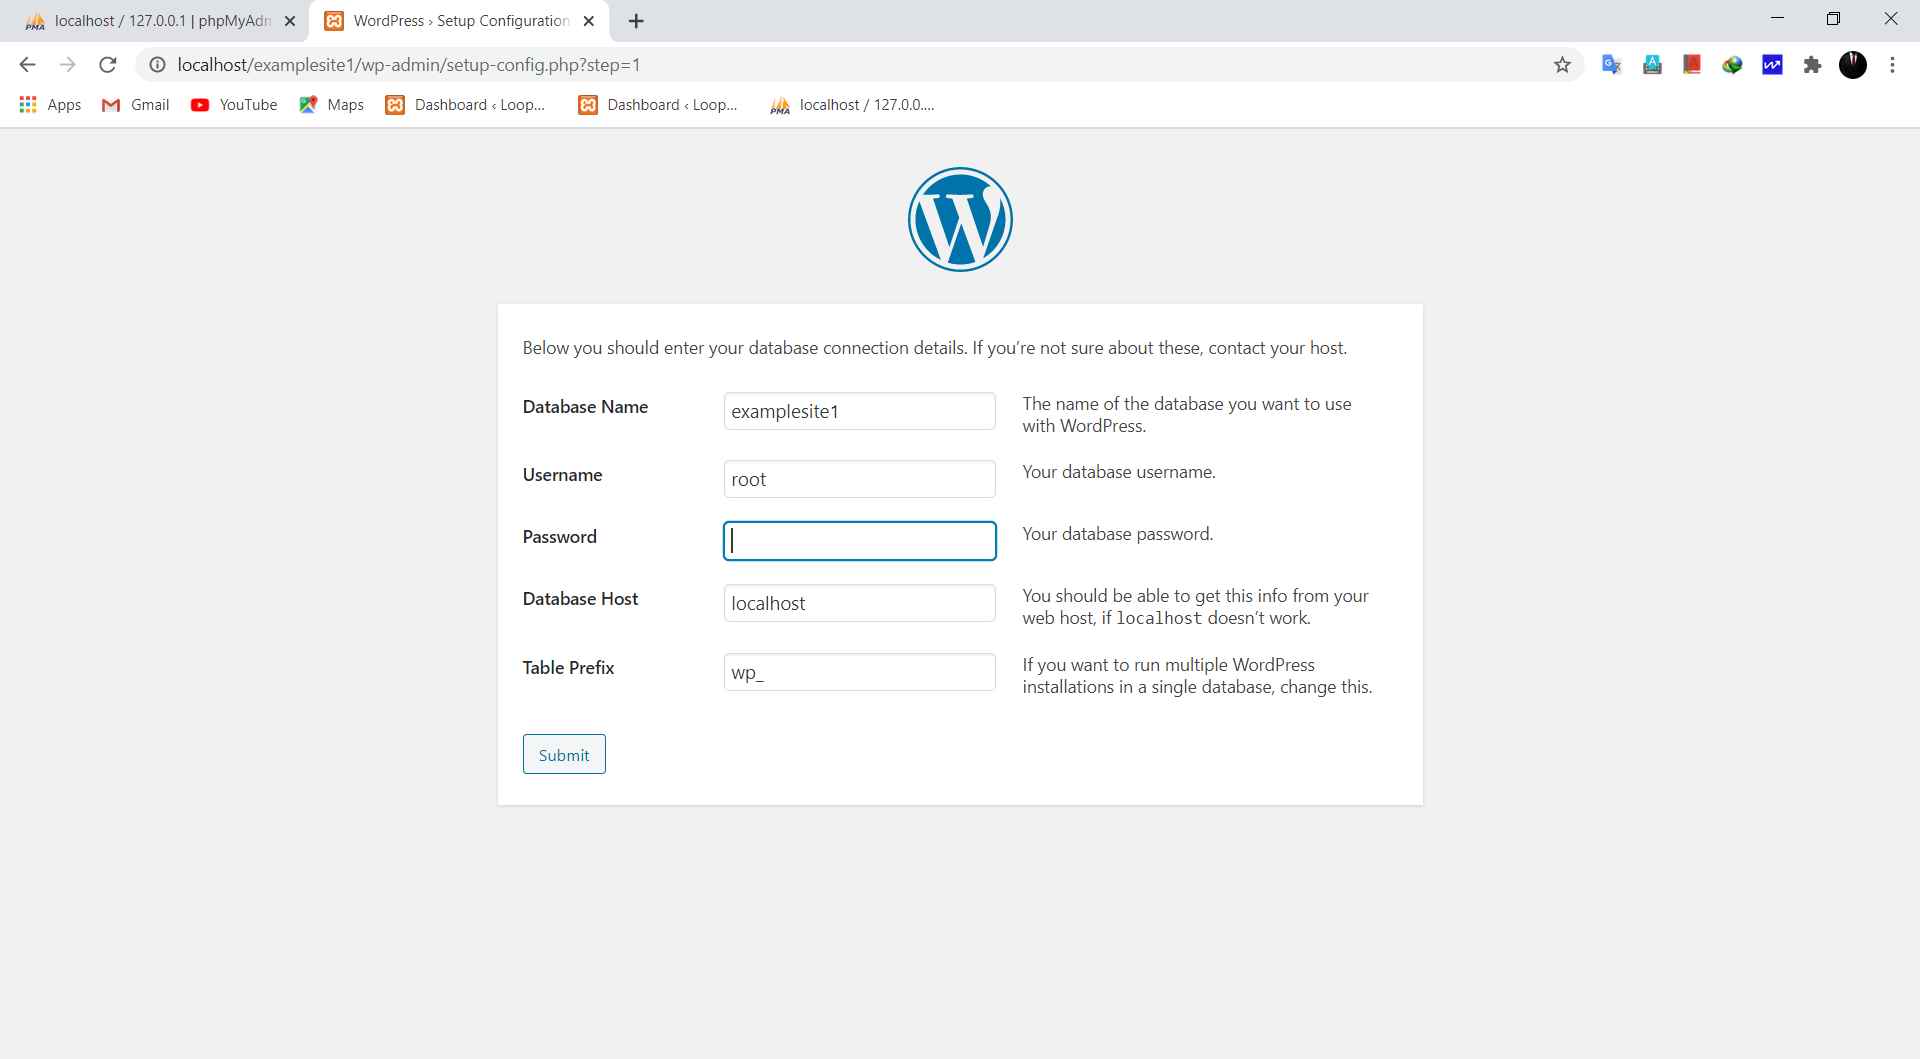
Now here you have to fill some necessary fields, such as-
- Database name– your site name, same name should be entered as you have used it to create a folder in “htdocs”
- User name– you should have the name “root”, this name is necessary, otherwise, you will not be allowed further.
- Password – you should clear the password filed, as there must be no password, it should be blank.
- And rest of the data be left as same as the default.
At last click on “submit”
Step 9.
Once you have clicked on submit, you will see a new screen as…
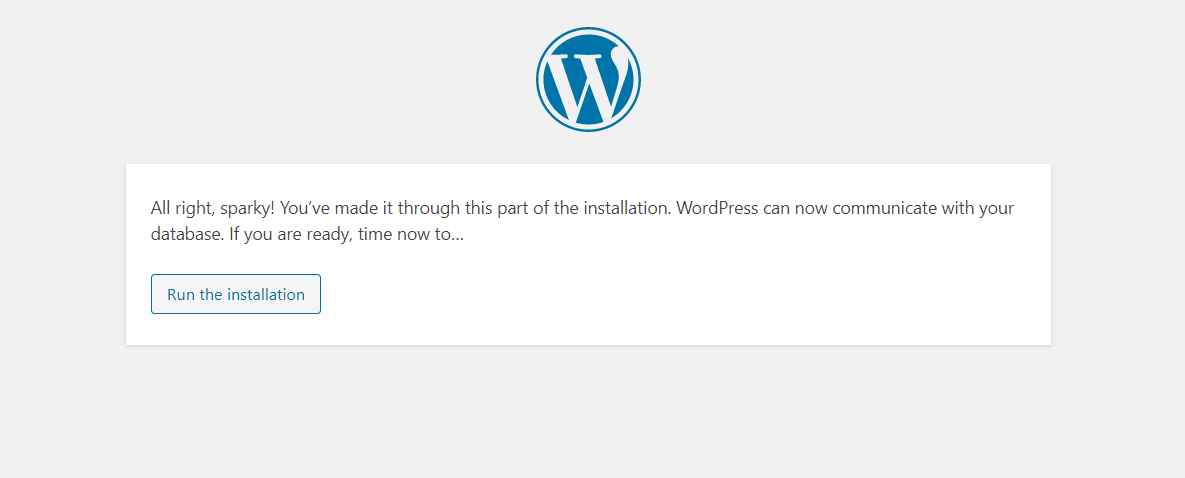
Just click on- “Run the installation” and after that, you will see the “welcome screen”, as….
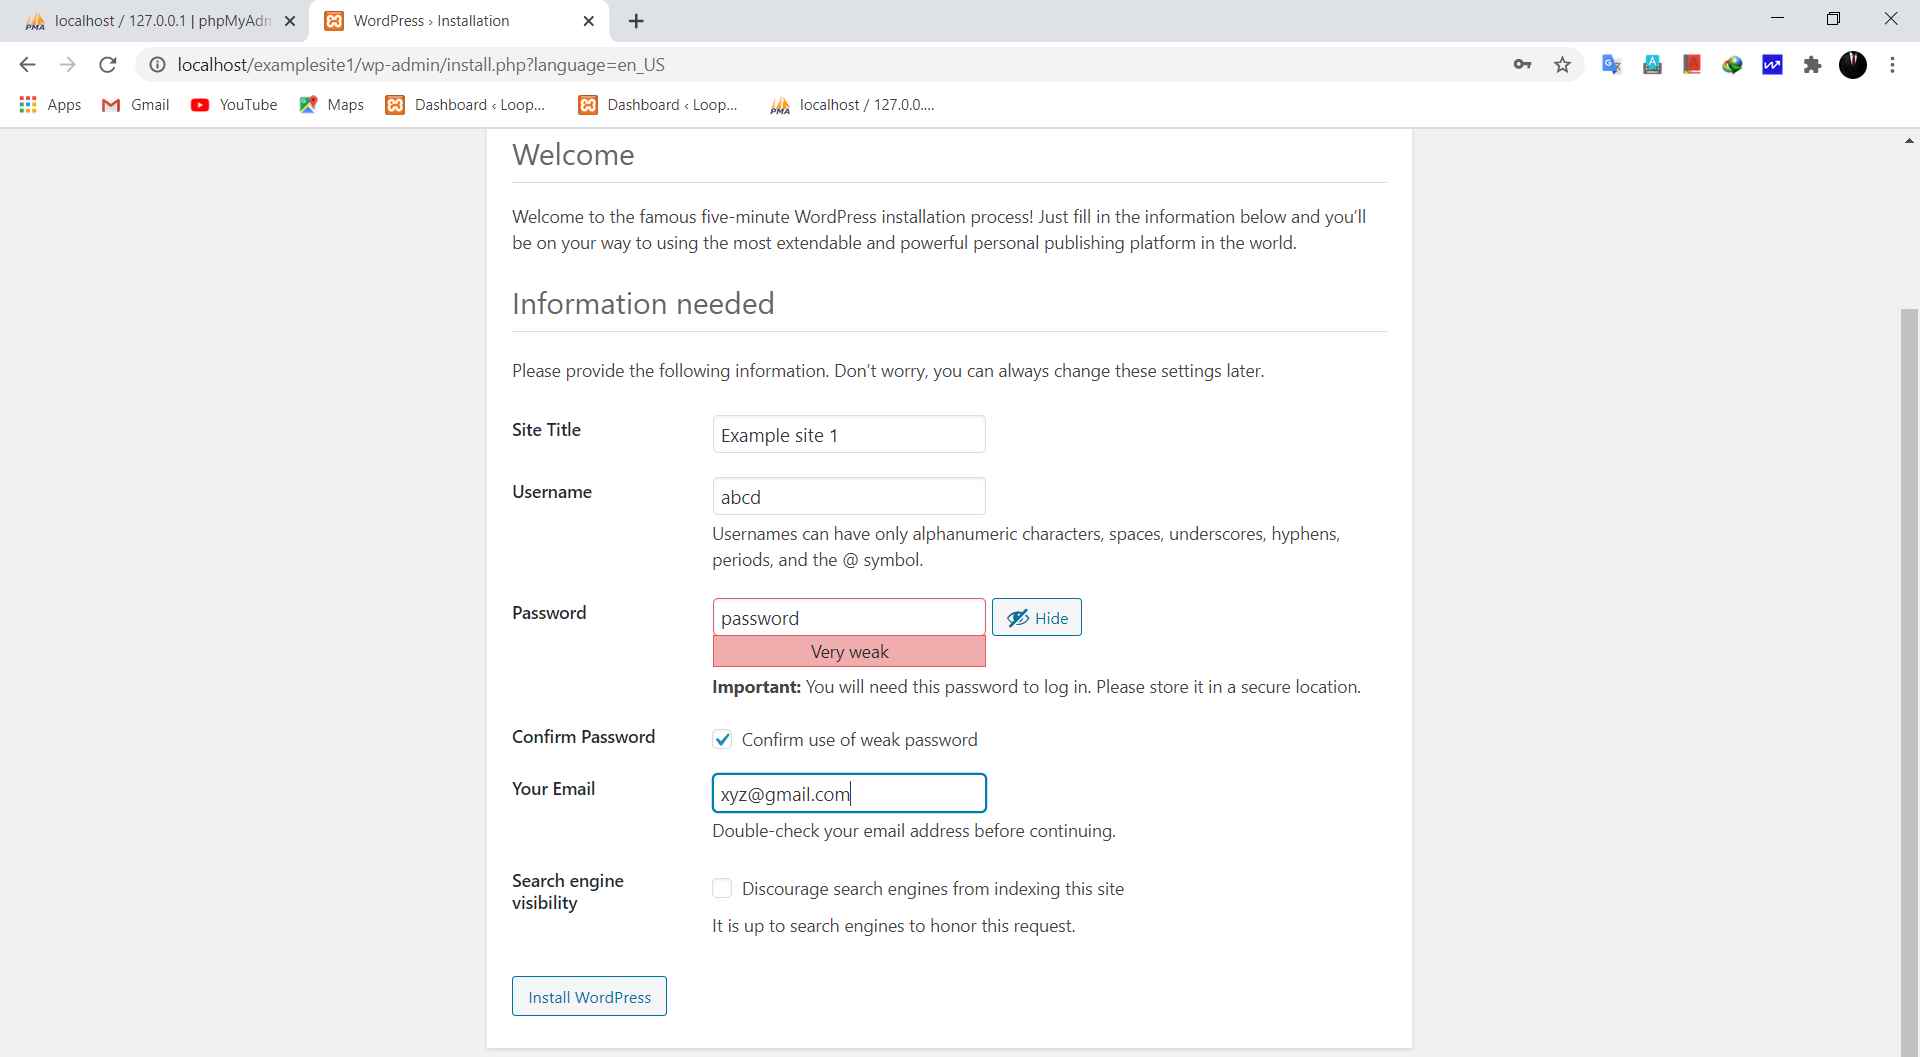
Here on this screen, you have to enter all the details such as – site name (any name), username and password (just enter any username and password and remember it), enter any g-mail id, and click on “Install WordPress”.
Step 10.
Now you just go to your browser and search- “{localhost/your site name (case sensitive)/wp-admin}”, this will take you to the login screen and just enter the login details and it will open the WordPress dashboard as…
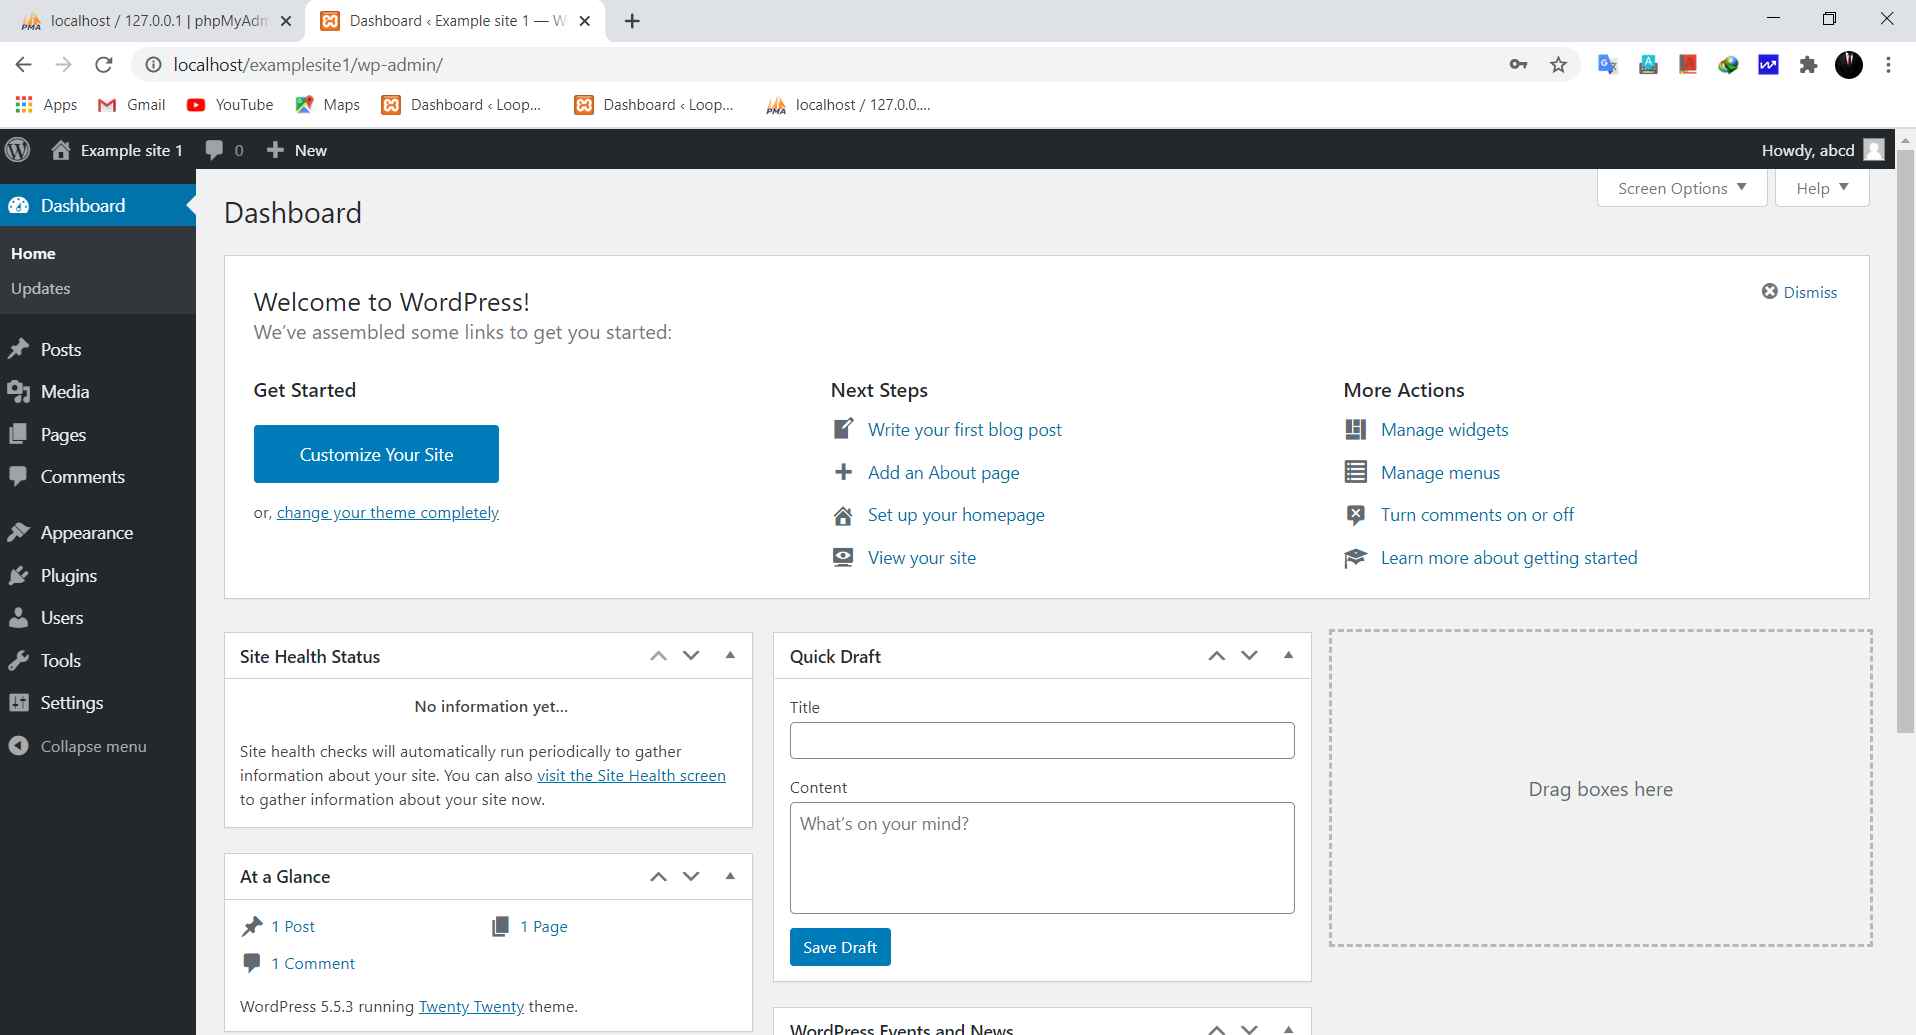
So for installing the more websites just follow the same procedure as…
- Create a folder with the name of the website in htdocs folder.
- Not create the database with the same name.
- Now set up the WordPress for the first use.
Difference between Xampp, wamp, and bitnami/ which is best.
Xampp, wamp, and bitnami are the webserver applications that are used to install WordPress in the localhost. These applications have some little bit different, but for the beginners let me lightly explain these terms.
Xampp is the webserver application, it is present for all the platforms and the name “xampp” is the abbreviation of- apache, Mariana DB, PHP, and Perl. While “wamp” is present for only the Windows platform, both xampp and wamp are completely free. Here bitnami is also the same but it’s slightly different from xampp and wamp, since it provides you very simple WordPress installation, since it contains the WordPress cms file already with it.
What is CMS is WordPress a CMS?
Yes, WordPress is a cms (content management system), which means it provides you a very simple and easy way of handling and customizing the websites and the contents of the websites. Now you may ask that- what is the use of the cms like WordPress and Jumla, if we can code the entire website by own. Well, you will encounter the need for the cms when you will be working on the websites regularly, as we will understand this with the help of an example. Just imagine that what if you will do when you are about to post something on your website, will you always code for the design of the pages and posts, it will be a very heavy task for you and to reduce this problem- cms plays a major role since you will have to post the article and contents and it will be automatically organized. You can also make your own cms by using “php”, you can set the rules on which your website design will work and you have to just post the content and your posts will be automatically be organized based on the previously defined rules, the work of cms is to manage your website contents, and to organize that “what to post where”.
So if you just liked this article, just stay connected with us for more, thanks for reading this article.
